Most people book a Bangkok photo studio based on price, location, or photos of the rooms. Few think about the actual lighting quality before they arrive. This guide explains what to look for, why it matters for portrait work, and how to read a studio's light before you commit to it.
Why Lighting Is the Variable That Actually Matters
Furniture, props, and decorated walls are easy to photograph in the studio's own marketing images and easy to fall in love with in advance. Lighting quality is harder to see from a thumbnail. Yet lighting is what determines whether your portraits look professional or flat, whether skin tones read as warm and alive or grey and dull, and whether the background recedes naturally or fights for attention.
The single most common complaint from people who have had a disappointing studio session is not that the room was the wrong colour. It is that the images came out looking flat, harsh, or artificial. All three are lighting problems.
Bangkok has a wide range of studio types from furnished natural-light rooms to fully controlled professional strobe setups. Each produces fundamentally different results on skin. Choosing between them is not just a matter of aesthetic preference. It is a technical decision that should be driven by what your specific portrait session needs.
Natural Light: What to Evaluate
Window size and orientation
Larger windows produce softer light. A small window creates a narrow, hard light source that casts strong shadows and requires more skill to manage. A wall of north-facing glass in a Bangkok studio creates broad, diffused light with minimal direct sun, which is ideal for portrait work at any hour.
South-facing or east/west-facing windows let in direct sunlight at certain times of day. Direct sun is harsh and unflattering on skin. It produces blown highlights and deep shadows simultaneously. If a Bangkok studio relies on a south-facing window, ask which hours produce usable light. Often the answer is a very narrow window of time, which limits your session flexibility.
Ceiling height
Low ceilings trap and reflect light in ways that are difficult to control. In a small furnished studio with a low ceiling, light bounces off coloured walls and introduces colour casts onto skin tones. This is almost never visible in the room itself, only in the photographs. A ceiling height of 3 metres or more gives light room to behave predictably and gives the photographer room to use a reflector or additional light sources without the ceiling interfering.
Colour temperature consistency
Natural daylight shifts in colour temperature throughout the day. Early morning light is cooler and bluer. Late afternoon is warmer and more amber. In a studio session, this creates a continuity problem. Images shot at 2pm and 4pm will have different colour casts unless the photographer corrects for them in editing. Studios with adjustable blinds or diffusion materials on windows give more control over this shift.
Watch for studios that mix natural window light with tungsten or warm LED fill lights. This creates a two-temperature environment that produces uneven, difficult-to-correct colour across the frame. The cleaner approach is either pure natural light or matched artificial sources.
What good natural light looks like on skin
When the light is right, skin tones in portraits feel three-dimensional. There is a gradual transition from highlight to shadow, the shadow side of the face retains detail, and the image does not need heavy editing to look natural. When the light is wrong, skin goes flat (usually a diffusion problem), or the shadow side loses all detail (usually a single-source problem with no fill), or the whole image has a colour bias that makes healthy skin look grey or orange.
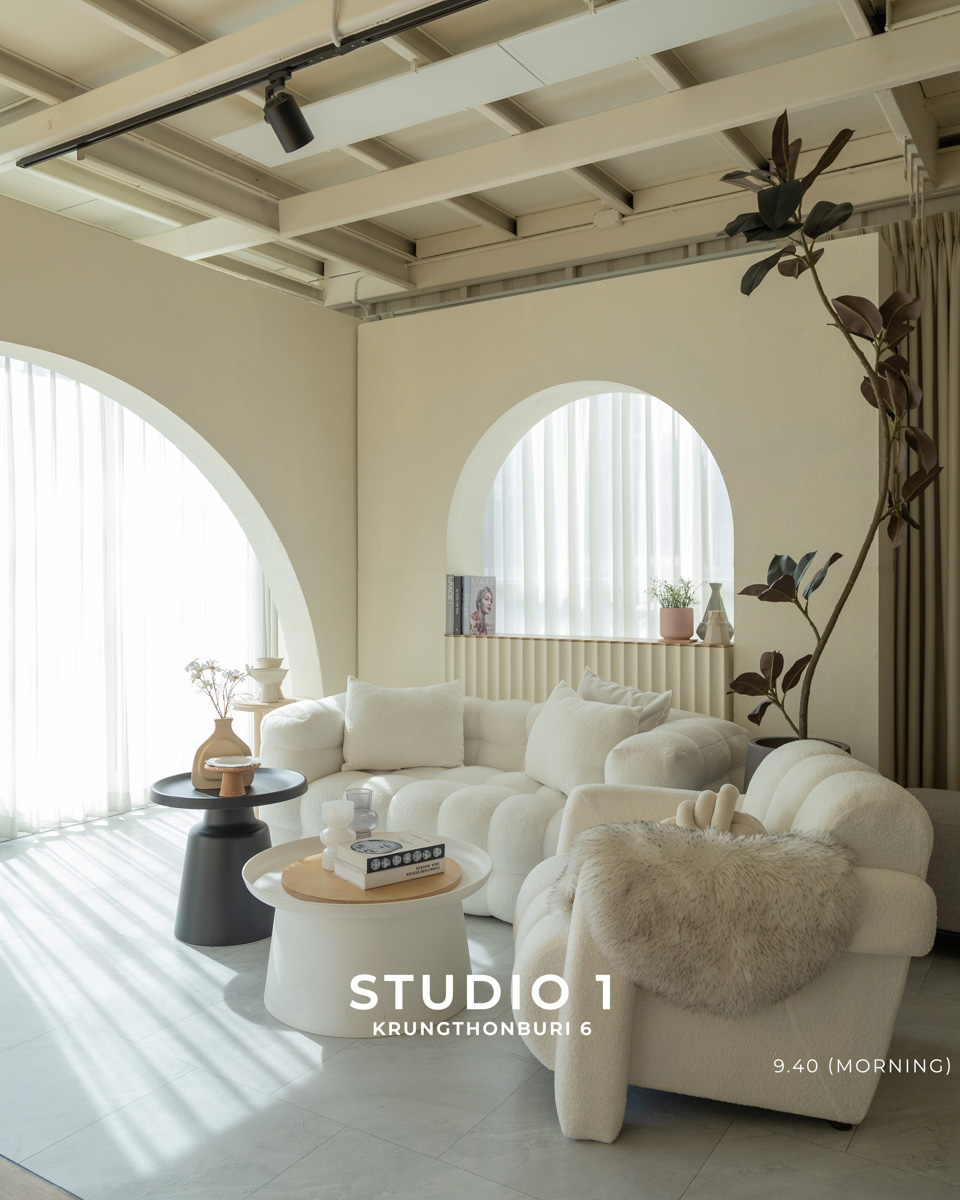
MostlySunny Studio near ICONSIAM is a practical example of a well-configured natural-light studio. The window coverage in their best rooms creates the kind of broad, soft source that portraits require, which is why we use it regularly for maternity sessions, portrait work, and business headshots where a warm, human look is the goal.
Controlled Artificial Light: What to Evaluate
Strobe vs continuous light
Strobe lighting (flash units) freezes movement and produces a clean, sharp result at any ambient light level. The flash duration is so short that ambient light in the room has almost no effect on the exposure. This makes strobes ideal for portrait work that requires precise, consistent results and for any session where you cannot predict what the available light will be doing.
Continuous lights (LEDs or tungsten) stay on all the time. They are easier to see and judge before shooting, which is useful for photographers who are less experienced with artificial lighting, but they are significantly less powerful than strobes at equivalent cost. For portrait work requiring a clean, consistent result, professional strobes are the better tool.
What mid-tier vs professional strobe equipment means in practice
Mid-tier equipment, which is what you find in Bangkok studios in the ฿1,000 per hour range, will produce perfectly adequate results for headshots, corporate portraits, and straightforward product shots. The power output is sufficient for standard portrait work, the modifiers produce usable light, and a competent photographer can work with it well.
Professional-grade strobe setups, such as those at Cinnamon Studio, offer significantly higher power output, more precise control over light shaping, and more modifier options. The practical difference shows in the quality of specular highlights on skin, in the ability to use high-speed sync for creative effects, and in the speed of recycling between shots. For commercial work where every detail matters, the equipment upgrade is worth the cost. For a solo headshot session, it is not.
Three-point lighting: what it produces and when it matters
Three-point lighting refers to a key light (the main source creating the primary shadow structure on the face), a fill light (a softer source on the opposite side that reduces shadow depth), and a separation or hair light (a light from behind or above that separates the subject from the background). This is the foundational setup for professional portrait photography in a studio.
When set correctly, three-point lighting gives the face natural-looking dimension. The shadow structure is readable, the face has shape, and the subject appears present in the space rather than pasted onto a background. Flat, single-source lighting removes this structure and is the most common cause of portraits that look like snapshots despite being taken in a professional studio.
Ask your photographer whether they work with a three-point setup for studio portrait work, and whether they adjust the ratios for different subjects. The answer tells you more about the likely quality of the result than anything visible in the studio itself.
Natural vs Strobe: Which Is Right for Your Portrait Session
The choice is not about which produces better images in absolute terms. It is about which suits your session's purpose and the look you want.
Natural light suits sessions where a warm, lifestyle quality is part of the brief. Maternity photography, personal branding portraits for coaches and therapists, lifestyle content, and any session where the subject needs to look relaxed and approachable generally benefit from the quality that good natural light produces. It also tends to put subjects at ease more quickly because the environment feels more like a room than a studio.
Controlled strobe light suits sessions where precision and repeatability matter more than ambience. Corporate headshots, model comp cards, product photography, and any work where you need a consistent result across multiple subjects or multiple sessions benefits from the control that artificial lighting provides. It also suits sessions where you cannot afford to be constrained by available daylight at a particular time of day.
Some sessions benefit from both. A personal branding shoot might start with natural window light for warm, approachable portraits and add a small strobe fill to lift the shadow side without losing the natural feel. This requires a photographer comfortable with mixing sources, but it is a common approach in Bangkok's better furnished studios.
Questions to Ask Before Booking a Bangkok Portrait Studio
- What direction do the windows face, and what hours produce the best usable light?
- What is the ceiling height in the room you are recommending?
- Are there artificial lights available to supplement natural light, and what type are they?
- Does the studio use any warm-toned fill lights that could conflict with window light colour temperature?
- For strobe-equipped studios: what is the maximum output of the key light, and what modifiers are included?
- Can the photographer share examples from that specific room or studio, not just their general portfolio?
You will rarely need to ask all six. But asking even two of them, specifically the window direction and whether artificial lights are present, will tell you more about a studio's suitability for portrait work than looking at its interior photography.
How We Handle Studio Selection
When you book a studio photoshoot with us, we advise on which studio suits your specific session based on the look you want and the kind of lighting it requires. We work regularly with furnished natural-light studios for warm portrait work and with backdrop studios for commercial headshots and product photography. For a full breakdown of the studios we work with, including pricing, room details, and who each one suits, see our Bangkok photo studio rental guide.
Ready to Book Your Studio Session?
We match every session to the right studio and lighting setup. View our studio photography services, book a session, or ask a question first.
Book a Session